Very Dirty Mop? Don’t Throw It Away – One Simple Ingredient Can Make It Like New
A mop is one of the most essential tools for keeping your home clean, but over time, even the most durable mops can get filthy, smelly, and difficult to use. If you’ve ever wrung out a mop only to see murky water, you know how frustrating it can be. Many people immediately think it’s time to toss the mop and buy a new one—but what if there was a simple, inexpensive way to restore it?
It turns out that with just one common household ingredient, you can clean even the dirtiest mop and make it look, feel, and smell almost like new.
Why Mops Get So Dirty
Mops pick up dirt, dust, hair, and bacteria from floors every time they’re used. Over time, residue from cleaning products and grime can build up in the fibers, causing:
-
A lingering unpleasant odor
-
Discoloration in the mop head
-
Reduced absorbency
-
Ineffective cleaning
This build-up not only makes cleaning less effective but can also spread germs around your home if not properly cleaned.
The One Ingredient That Works Wonders
The secret ingredient for reviving a mop is white vinegar. White vinegar is a natural, non-toxic cleaning powerhouse that can:
-
Break down soap scum, grease, and grime
-
Kill bacteria and germs
-
Remove odors
-
Restore the mop fibers’ softness and absorbency
It’s inexpensive, easy to find in any grocery store, and safe for most mop materials.
Step-by-Step Guide to Revive Your Mop
Step 1: Prepare a Cleaning Solution
Fill a bucket with hot water—enough to fully submerge the mop head. Add one cup of white vinegar for every gallon of water.
Optional: For extra cleaning power, you can add a few drops of dish soap.
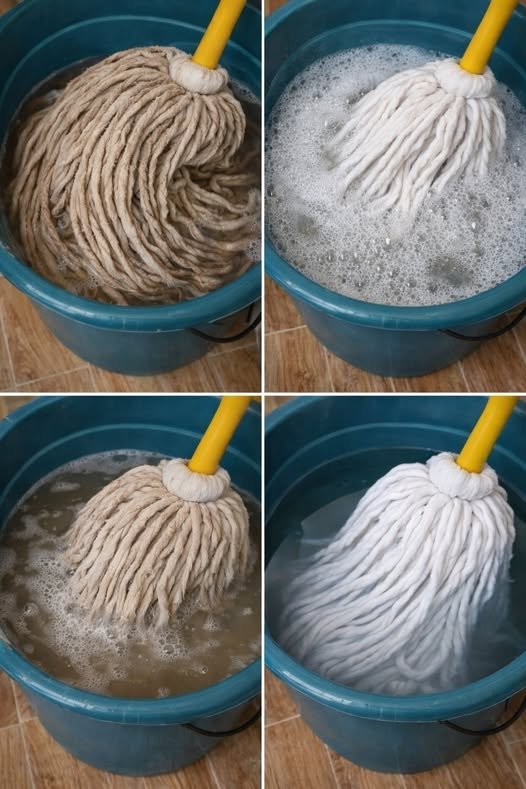
Step 2: Soak the Mop
Place the dirty mop head into the solution and let it soak for 30 minutes to an hour. The vinegar will start breaking down the built-up dirt and neutralizing any unpleasant odors.
Step 3: Scrub If Necessary
If your mop is extremely grimy, gently rub the fibers with your hands or a soft brush to help remove stubborn residue.
Step 4: Rinse Thoroughly
Rinse the mop under warm running water until the water runs clear and no soap or grime remains.
Step 5: Dry Completely
Allow the mop to air dry completely before storing it. Hanging it in a well-ventilated area helps prevent bacteria and mold growth.
Extra Tips for Keeping Your Mop Clean
-
Clean regularly: Soak your mop in vinegar at least once a month to prevent build-up.
-
Avoid harsh chemicals: Bleach can damage mop fibers over time. Vinegar is gentler and just as effective.
-
Use multiple mop heads: Having an extra mop head allows you to rotate, keeping mops fresher longer.
-
Store properly: Hang your mop head to dry rather than leaving it sitting in a bucket of water.
Why This Trick Works
White vinegar is slightly acidic, which allows it to dissolve mineral deposits, soap scum, and grease that accumulate in mop fibers. Its natural antibacterial properties help eliminate odors caused by mold and bacteria, making your mop clean, fresh, and ready to use again.
Many households have discovered this simple trick, saving money and extending the life of their mops. Instead of throwing away a perfectly good cleaning tool, you can restore it with just one ingredient.
Benefits of Cleaning Your Mop With Vinegar
-
Saves money: No need to constantly buy new mops.
-
Eco-friendly: Avoids excess waste and reduces chemical use.
-
Sanitary: Kills germs and bacteria hiding in the mop.
-
Effective cleaning: A restored mop is better at picking up dirt and leaving floors spotless.
Final Thoughts
Next time your mop looks like it’s beyond saving, remember this simple trick: a soak in white vinegar. This inexpensive and easy method can turn a very dirty mop into a cleaning tool that works like new.
Not only will your floors get cleaner, but you’ll also save money, reduce waste, and avoid the frustration of a grimy mop. It’s amazing what one household ingredient can do!