Make Your Rolls Tight and You’ll Thank Me Forever
If you’ve ever baked rolls that spread flat, baked unevenly, or lacked that soft, fluffy pull-apart texture, the problem usually isn’t the recipe. It’s the shape. Learning how to make tight rolls is one of the most underrated skills in baking—and once you master it, you’ll never struggle with rolls again.
Tight rolls don’t just look better. They rise higher, bake evenly, and stay soft for longer. Whether you’re making dinner rolls, brioche, milk rolls, or sweet rolls, this one technique can completely change your results. Try it once, and you’ll thank me forever.
What Does “Tight Rolls” Actually Mean?
“Tight” doesn’t mean hard or dense. In baking terms, tight rolls are rolls that have:
-
Surface tension on the outside
-
A smooth, round shape
-
Even internal crumb structure
-
Strong upward rise instead of spreading outward
The tight outer skin helps trap air created during fermentation, allowing the roll to expand upward in the oven rather than flatten.
Why Tight Rolls Matter So Much
Many bakers focus on ingredients and forget shaping. But shaping is what gives rolls their final structure.
Benefits of Tight Rolls:
-
Taller, bakery-style appearance
-
Softer, fluffier interior
-
Even baking
-
Better oven spring
-
Professional finish
Loose shaping leads to flat, dull rolls—no matter how good the dough is.
The Science Behind Tight Rolls
When dough is shaped tightly, the gluten strands stretch across the surface, creating tension. This tension acts like a balloon, holding gas inside during proofing and baking.
Without tension:
-
Gas escapes
-
Rolls spread
-
Texture becomes uneven
Tight shaping = controlled expansion.
Dough Matters First
Before shaping, your dough must be right. Tight rolls start with properly developed dough.
Dough Basics for Tight Rolls:
-
Smooth and elastic
-
Not sticky, not dry
-
Properly kneaded
-
Fully rested
If the dough tears while shaping, it’s either under-kneaded or hasn’t rested long enough.
Step-by-Step: How to Shape Tight Rolls
This method works for almost any roll recipe.
Step 1: Divide Evenly
Weigh your dough portions if possible. Even sizes mean even baking.
Step 2: Pre-Shape Lightly
Gently shape each piece into a loose ball. Let them rest for 10 minutes. This relaxes the gluten.
Step 3: Create Surface Tension
Now the magic happens:
-
Place the dough seam-side up
-
Pull the edges toward the center
-
Pinch to seal
-
Flip seam-side down
Cup your hand over the dough and roll it gently in small circles against the surface, pulling it slightly toward you. You’ll feel the surface tighten.
Step 4: Stop at the Right Time
Once the surface is smooth and taut, stop. Over-tightening can tear the dough.
Common Mistakes That Ruin Roll Shape
1. Skipping the Rest
If dough resists shaping, it needs rest—not force.
2. Too Much Flour
Excess flour prevents grip, making it impossible to build tension.
3. Weak Seams
If the seam isn’t sealed, rolls will open during baking.
4. Over-Proofing
Over-proofed rolls lose structure and collapse.
Proofing Tight Rolls Correctly
Shaping doesn’t end the job. Proofing matters just as much.
Tips for Proofing:
-
Rolls should feel light, not puffy
-
Gently press with a finger: indentation should slowly bounce back
-
Over-proofed rolls deflate easily
Tight shaping gives you a wider proofing window, which means more forgiving dough.
Baking Tight Rolls for Best Results
When tight rolls hit the oven:
-
They rise upward
-
Edges stay defined
-
Crumb opens evenly
For extra softness:
-
Brush with milk or butter before baking
-
Cover loosely if browning too fast
-
Brush with butter immediately after baking
Tight Rolls for Different Types of Bread
Dinner Rolls
Tight shaping gives classic round tops and fluffy centers.
Brioche Rolls
Essential for structure due to high butter content.
Sweet Rolls
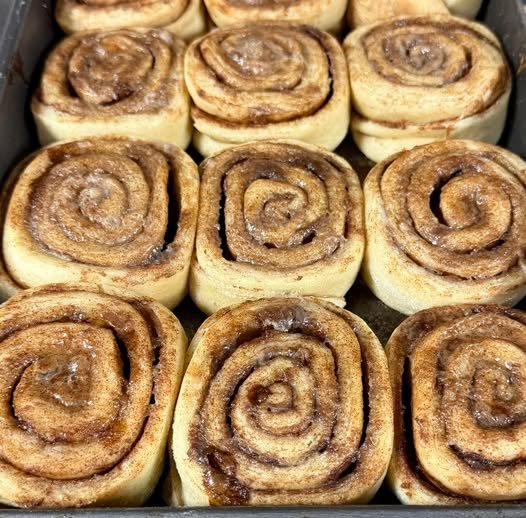
Helps maintain spiral shape and prevents spreading.
Milk Rolls
Creates that soft, cloud-like texture everyone loves.
Why Bakers Swear by Tight Rolls
Professional bakers don’t rely on luck. Tight shaping is a standard technique in bakeries because it:
-
Controls fermentation
-
Improves consistency
-
Elevates appearance
-
Enhances texture
Once you learn it, every roll you bake improves instantly.
Practice Makes Perfect
Your first few rolls may feel awkward. That’s normal. Dough handling is a skill built through repetition, not talent.
With practice, you’ll:
-
Feel the tension
-
Know when to stop
-
Shape faster and cleaner
-
Produce consistent results
And once it clicks, you’ll never go back.
Final Thoughts
If your rolls have ever disappointed you, don’t change the recipe—change the shape. Tight rolls are the difference between average homemade bread and bakery-quality results.
Master this one technique, and every batch will rise higher, bake better, and look beautiful.
Make your rolls tight—and trust me, you’ll thank me forever.