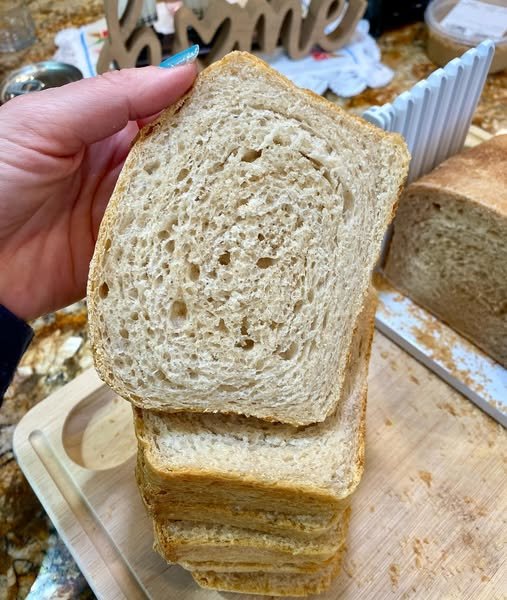
Gluten-Free Sourdough Sandwich Bread
For many people who avoid gluten, finding a loaf of bread that is both soft and flavorful can be a challenge. Store-bought gluten-free bread often has a dry texture, a crumbly structure, or a bland taste. That’s why homemade gluten-free sourdough sandwich bread has become increasingly popular among home bakers. This bread offers a tender crumb, a mild tangy flavor, and a structure strong enough for sandwiches, toast, and everyday meals.
Unlike traditional sourdough made with wheat flour, gluten-free sourdough relies on a different combination of flours and natural fermentation to create a delicious loaf. With the right ingredients and a little patience, you can bake a soft and nutritious gluten-free sourdough bread that rivals bakery versions.
Why Make Gluten-Free Sourdough Bread?
Gluten-free sourdough bread offers several advantages over typical gluten-free loaves. The natural fermentation process helps develop deeper flavors while improving the texture of the bread. Instead of being dense or crumbly, this bread becomes soft, airy, and sliceable—perfect for sandwiches.
Fermentation may also make the bread easier to digest for some people because the natural bacteria in sourdough help break down certain compounds in the flour. Additionally, baking your own bread allows you to control the ingredients and avoid preservatives commonly found in packaged products.
Another benefit is versatility. Once you master the basic recipe, you can customize it with seeds, herbs, or different flour blends to create a loaf that suits your taste.
Ingredients
To make one standard sandwich loaf, you will need:
Dry Ingredients
- 1 cup brown rice flour
- 1 cup sorghum flour
- ½ cup tapioca starch
- ¼ cup potato starch
- 1 tablespoon psyllium husk powder
- 1 teaspoon salt
Wet Ingredients
- 1 cup active gluten-free sourdough starter
- 1 tablespoon honey or maple syrup
- 2 tablespoons olive oil or avocado oil
- 1½ cups warm water
Equipment
- Mixing bowl
- Wooden spoon or spatula
- Loaf pan (8×4 or 9×5 inches)
- Parchment paper
- Kitchen towel
Step-by-Step Instructions
1. Prepare the Dough
In a large mixing bowl, combine the brown rice flour, sorghum flour, tapioca starch, potato starch, psyllium husk powder, and salt. Stir the dry ingredients thoroughly to ensure the starches and flours are evenly distributed.
In a separate bowl, mix the sourdough starter, honey, olive oil, and warm water. Stir until the mixture is smooth and fully combined.
Slowly pour the wet mixture into the dry ingredients while stirring continuously. The dough will look different from traditional wheat dough—it will be thicker than batter but softer than typical bread dough.
2. Mix and Hydrate
Continue mixing for about 2–3 minutes until the dough becomes smooth and cohesive. Psyllium husk plays an important role here, helping create a flexible structure that replaces gluten.
Allow the dough to rest for about 5 minutes so the psyllium can fully absorb the liquid and form a gel-like texture.
3. Shape the Loaf
Line your loaf pan with parchment paper. Transfer the dough into the pan and smooth the top using a spatula or slightly damp hands.
Gluten-free dough doesn’t require kneading or traditional shaping. Simply leveling the surface will help the loaf bake evenly.
4. Fermentation and Rising
Cover the loaf pan with a clean kitchen towel and place it in a warm area of your kitchen. Allow the dough to ferment and rise for about 4–6 hours, depending on room temperature and the strength of your sourdough starter.
You should notice the dough expanding and developing small bubbles on the surface.
5. Preheat the Oven
Preheat your oven to 375°F (190°C) about 20 minutes before baking. A fully heated oven helps create better oven spring and a well-structured loaf.
6. Bake the Bread
Place the loaf pan in the center of the oven and bake for 45–55 minutes. The crust should become golden brown and slightly firm to the touch.
For best results, you can remove the loaf from the pan during the final 10 minutes of baking and place it directly on the oven rack to help the sides crisp slightly.
7. Cool Before Slicing
Once baked, transfer the bread to a wire rack and allow it to cool completely before slicing. This step is crucial because gluten-free bread continues to set as it cools.
Cutting too early may cause the loaf to become gummy inside.
Tips for Perfect Gluten-Free Sourdough Bread
Use an active starter
Your sourdough starter should be bubbly and active before baking. Feeding it several hours beforehand will help ensure a good rise.
Measure carefully
Gluten-free baking relies on accurate measurements. Using a kitchen scale can improve consistency.
Don’t skip psyllium husk
This ingredient acts as a binding agent, replacing the elasticity that gluten normally provides.
Let the bread rest overnight
Many gluten-free sourdough loaves taste even better the next day as the flavors continue to develop.
Serving Ideas
This gluten-free sourdough sandwich bread is extremely versatile and works well in many meals. Try it with:
- Classic turkey or chicken sandwiches
- Avocado toast with eggs
- Grilled cheese sandwiches
- Toast with butter and jam
- French toast for a weekend breakfast
Its soft texture and mild tangy flavor make it suitable for both savory and sweet toppings.
Storage Tips
Homemade gluten-free bread doesn’t contain preservatives, so proper storage is important.
- Room temperature: Store in an airtight container for up to 2 days.
- Refrigerator: Keeps fresh for about 5 days.
- Freezer: Slice the bread and freeze for up to 2 months.
Freezing slices allows you to toast individual pieces whenever you need them.
Final Thoughts
Baking your own gluten-free sourdough sandwich bread may seem intimidating at first, but the results are well worth the effort. With its soft texture, balanced flavor, and wholesome ingredients, this homemade loaf offers a satisfying alternative to store-bought gluten-free bread.
Once you become comfortable with the recipe, you can experiment with different flour combinations, seeds, or herbs to create your own signature loaf. Whether you enjoy it toasted for breakfast or stacked high with sandwich fillings at lunch, gluten-free sourdough bread proves that baking without gluten can still be delicious, nourishing, and deeply rewarding.