Gluten-Free Peanut Butter Balls
If you love sweet, nutty, and bite-sized treats, these gluten-free peanut butter balls are the perfect snack. Rich, chewy, and packed with peanut butter flavor, they’re simple to make and naturally free of gluten, making them a great option for anyone with dietary restrictions.
These no-bake treats are ideal for holiday parties, after-school snacks, or a quick energy boost. With just a few pantry staples, you can whip up a batch that’s both delicious and satisfying. Plus, they can easily be customized with chocolate, nuts, or coconut for an extra touch.
Why You’ll Love These Peanut Butter Balls
Gluten-free: Made without any wheat flour, safe for those avoiding gluten.
No-bake: Easy and quick, perfect for busy schedules.
Rich flavor: Peanut butter, honey, and optional chocolate combine for an irresistible taste.
Versatile: Customize with chocolate, shredded coconut, or chopped nuts.
Kid-friendly: Perfect for school snacks or lunchboxes.
Ingredients
This recipe makes about 20–24 peanut butter balls.
Base Ingredients
-
1 cup creamy peanut butter (or natural peanut butter)
-
½ cup honey or maple syrup
-
2 cups gluten-free rolled oats
-
1 teaspoon vanilla extract
-
Pinch of salt
Optional Coating
-
½ cup dairy-free chocolate chips, melted
-
¼ cup finely chopped nuts or shredded coconut
How to Make Gluten-Free Peanut Butter Balls
Step 1: Prepare the Mixture
In a medium bowl, combine the peanut butter, honey, and vanilla extract. Stir until smooth.
Add the rolled oats and a pinch of salt. Mix until all ingredients are evenly combined. The mixture should be thick but sticky enough to form balls.
Step 2: Shape the Balls
Scoop about 1 tablespoon of the mixture and roll it between your palms to form a ball. Repeat until all the mixture is used.
Place the balls on a parchment-lined baking sheet.
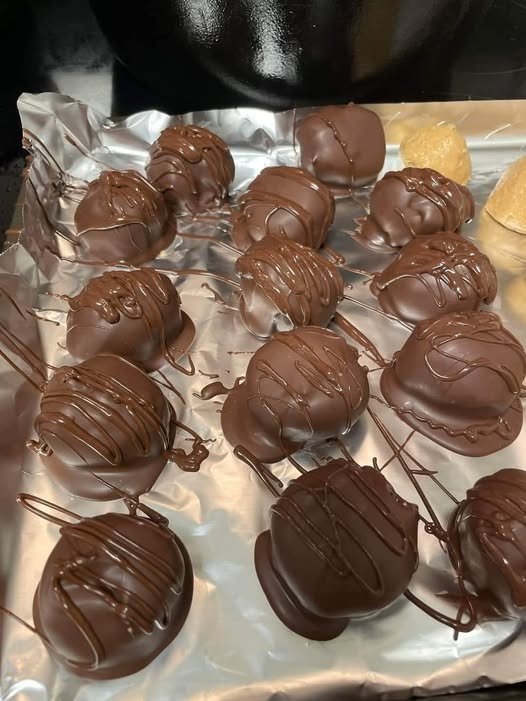
Step 3: Optional Chocolate Coating
If you want a chocolate shell, melt the chocolate chips in a microwave-safe bowl in 20–30 second intervals, stirring in between.
Dip each peanut butter ball into the melted chocolate, using a fork to coat evenly. Place back on the parchment paper to set.
You can also roll the balls in shredded coconut or chopped nuts for a different finish.
Step 4: Chill and Set
Refrigerate the peanut butter balls for at least 30 minutes to firm up. This ensures they hold their shape and are easy to handle.
Tips for the Perfect Peanut Butter Balls
Use creamy peanut butter: It creates a smoother texture that’s easier to roll.
Adjust sweetness: Taste the mixture before rolling and add more honey or maple syrup if desired.
Make bite-sized: About 1 tablespoon each is perfect for snacking.
Storage: Keep them in an airtight container in the fridge for up to 2 weeks, or freeze for up to 2 months.
Variations
Chocolate-Peanut Butter Balls
Dip the balls in melted chocolate and sprinkle with sea salt for a decadent treat.
Coconut Peanut Butter Balls
Roll the balls in shredded coconut for a tropical twist.
Nutty Peanut Butter Balls
Add chopped almonds, walnuts, or pecans into the mixture for extra crunch.
Protein Boost
Mix in 2–3 tablespoons of your favorite protein powder to make a protein-packed snack.
Serving Suggestions
These peanut butter balls are perfect for:
-
Snack time or lunchboxes
-
Dessert after dinner
-
Holiday cookie platters
-
Quick energy boosts before or after workouts
Final Thoughts
Gluten-free peanut butter balls are a simple, delicious, and versatile treat that everyone can enjoy. They require minimal ingredients, no baking, and are easy to customize.
Whether you enjoy them plain, coated in chocolate, or rolled in coconut, these little bites are packed with flavor and energy. They’re the perfect combination of sweet and nutty, making them an irresistible snack for both kids and adults.