Carter’s Blonde Cinnamon Rolls
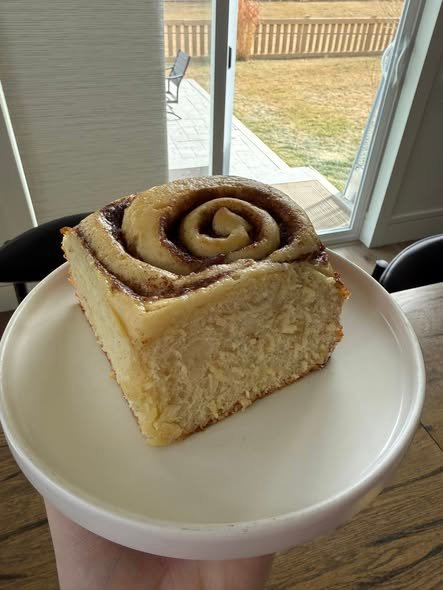
There’s something magical about cinnamon rolls straight from the oven. Carter’s Blonde Cinnamon Rolls take this classic breakfast treat to the next level with soft, golden dough, a buttery cinnamon-sugar filling, and a luscious vanilla glaze that perfectly balances sweetness with a hint of caramel. These rolls are tender, fluffy, and melt-in-your-mouth delicious — a guaranteed crowd-pleaser for family breakfasts, brunch gatherings, or a decadent snack any time of day.
Whether you’re a seasoned baker or trying cinnamon rolls for the first time, this guide will walk you through every step, ensuring your rolls come out perfectly golden, soft, and beautifully glazed.
Why You’ll Love Carter’s Blonde Cinnamon Rolls
-
Soft and airy: The dough is light and fluffy, rising to perfection.
-
Buttery cinnamon filling: A simple blend of sugar, cinnamon, and butter creates irresistible layers.
-
Blonde glaze finish: A sweet, creamy glaze adds that signature “blonde” shine.
-
Customizable: Add nuts, chocolate chips, or a drizzle of caramel for extra indulgence.
-
Perfect for any occasion: Ideal for weekend breakfasts, brunch parties, or gifts.
Ingredients
For the Dough
-
4 cups (500 g) all-purpose flour
-
¼ cup (50 g) granulated sugar
-
2 ¼ tsp (1 packet) active dry yeast
-
½ tsp salt
-
1 cup (240 ml) warm milk (110°F / 43°C)
-
⅓ cup (75 g) unsalted butter, melted
-
2 large eggs
For the Filling
-
½ cup (100 g) brown sugar, packed
-
2 tbsp ground cinnamon
-
¼ cup (60 g) unsalted butter, softened
For the Blonde Glaze
-
1 cup (120 g) powdered sugar
-
2–3 tbsp milk or cream
-
½ tsp vanilla extract
Optional additions: chopped pecans, walnuts, or caramel drizzle.
Step-by-Step Instructions
1. Activate the Yeast
Start by combining warm milk and sugar in a small bowl. Sprinkle in the active dry yeast and stir gently. Let it sit for 5–10 minutes until foamy. This step ensures your dough rises beautifully and develops a soft texture.
2. Make the Dough
In a large mixing bowl, combine flour and salt. Add the yeast mixture, melted butter, and eggs, mixing until a rough dough forms. Turn it out onto a lightly floured surface and knead for 8–10 minutes until smooth and elastic. Kneading develops gluten, giving your rolls structure while keeping them tender.
Place the dough in a lightly greased bowl, cover it with a clean towel, and let it rise for 1–2 hours, or until doubled in size. This slow rise ensures soft, airy layers.
3. Prepare the Filling
While the dough rises, mix brown sugar and cinnamon in a small bowl. Set aside. Soften the butter so it’s spreadable but not melted. The butter helps the sugar and cinnamon stick and creates those signature gooey layers.
4. Roll Out the Dough
Once risen, punch down the dough gently to release air. On a floured surface, roll the dough into a rectangle, approximately 12×18 inches. Spread the softened butter evenly across the dough, leaving a small border around the edges. Sprinkle the cinnamon-sugar mixture generously over the buttered surface.
Optional: sprinkle chopped nuts or mini chocolate chips at this stage for extra flavor.
5. Roll and Slice
Starting from the long edge, carefully roll the dough into a tight log. Pinch the seam to seal. Using a sharp knife, slice the log into 12 even rolls. A serrated knife works best to avoid squishing the dough.
6. Second Rise
Place the rolls in a greased 9×13-inch baking dish, leaving a little space between each roll. Cover loosely and allow them to rise for another 30–45 minutes until puffy. This final rise gives the rolls their soft, airy texture.
7. Bake the Rolls
Preheat your oven to 350°F (175°C). Bake the rolls for 25–30 minutes, or until the tops are lightly golden and the rolls feel soft but springy. Avoid overbaking — the rolls should be tender, not dry.
8. Prepare the Blonde Glaze
While the rolls bake, combine powdered sugar, milk, and vanilla extract in a small bowl. Stir until smooth and pourable. Adjust the milk to achieve your desired consistency — thicker for drizzling, thinner for soaking slightly into the rolls.
9. Glaze and Serve
Once the rolls are baked, allow them to cool for 5–10 minutes. Drizzle the glaze generously over the warm rolls. The heat will help the glaze soak in slightly, creating a shiny, sweet finish.
Serve warm for maximum gooey, soft, buttery enjoyment. These rolls are perfect with coffee, tea, or a glass of milk.
Tips for the Perfect Blonde Cinnamon Rolls
-
Use fresh yeast: Ensures maximum rise and fluffy texture.
-
Don’t overmix the filling: Preserves the soft, tender layers.
-
Control sweetness: Adjust glaze thickness to taste.
-
Make ahead: Prepare rolls up to the second rise, cover, and refrigerate overnight. Bake in the morning for fresh rolls.
-
Freezing: Freeze unbaked rolls for up to 2 months; thaw and bake as directed.
Flavor Variations
-
Caramel Pecan Rolls: Add chopped pecans and drizzle with caramel in addition to glaze.
-
Chocolate Swirl Rolls: Sprinkle mini chocolate chips in the filling.
-
Citrus Blonde Rolls: Add a teaspoon of lemon or orange zest to the glaze for a refreshing twist.
-
Maple Glaze: Replace vanilla with ½ tsp maple extract for autumnal flavor.
Storage
-
Room Temperature: Store in an airtight container for up to 2 days.
-
Refrigerator: Keep covered for up to 5 days.
-
Freezer: Freeze baked rolls for up to 2 months; thaw before serving.
Reheat gently in the microwave or oven to restore that freshly baked softness.
Approximate Nutrition (Per Roll)
-
Calories: 320–350 kcal
-
Protein: 5 g
-
Carbohydrates: 50 g
-
Fat: 12 g
-
Fiber: 1 g
Final Thoughts
Carter’s Blonde Cinnamon Rolls combine the classic comfort of cinnamon rolls with a beautiful golden glaze that makes them irresistible. Soft, tender, and perfectly sweet, they’re ideal for special mornings, brunch gatherings, or just treating yourself.
With this recipe, anyone can bake bakery-quality cinnamon rolls at home. The dough is forgiving, the filling is simple, and the glaze is a small but impactful finishing touch. The best part? You can experiment with flavors — chocolate, nuts, caramel, or citrus — to make these rolls uniquely your own.
Serve them warm, watch them disappear, and enjoy the smell of freshly baked bliss in your kitchen.