Homemade English Muffins: Soft, Fluffy, and Perfectly Toasted
There’s nothing quite like the comforting aroma of freshly baked English muffins wafting through your kitchen. Whether you enjoy them for breakfast with a pat of butter, as the base for Eggs Benedict, or simply toasted with jam, homemade English muffins offer a delicate, slightly chewy texture and a subtle tang that store-bought versions often lack. Making English muffins at home is easier than you might think, and the results are truly worth the effort.
What Are English Muffins?
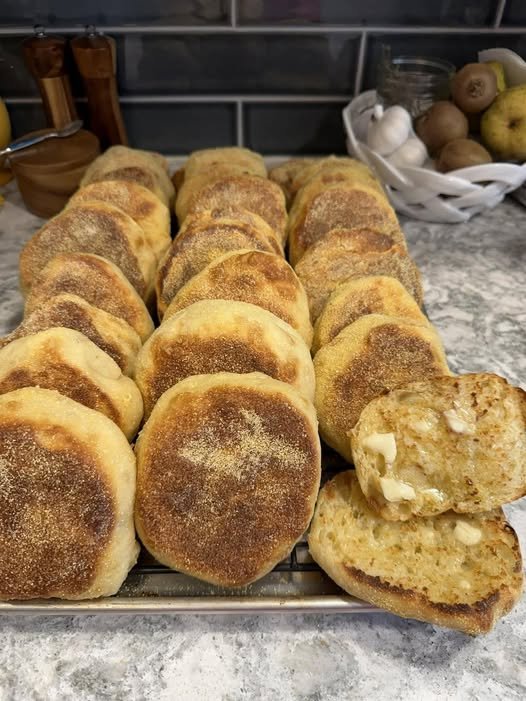
English muffins are small, round, yeast-leavened breads known for their soft interior, crisp exterior, and signature nooks and crannies that perfectly hold butter, honey, or your favorite spreads. Unlike regular bread, they are cooked on a griddle or skillet rather than baked in the oven, giving them a golden, lightly crisp crust and a tender crumb inside. Though widely associated with British cuisine, English muffins have become a staple breakfast item around the world.
Ingredients You’ll Need
To make approximately 8-10 English muffins, gather the following simple ingredients:
-
2 cups (240 g) all-purpose flour – plus extra for dusting
-
1 cup (240 ml) whole milk – warmed to about 110°F/43°C
-
2 ¼ teaspoons (1 packet) active dry yeast
-
2 tablespoons granulated sugar
-
½ teaspoon salt
-
2 tablespoons unsalted butter, melted
-
Cornmeal or semolina – for dusting
Step-by-Step Instructions
1. Activate the Yeast
Begin by warming the milk until it is comfortably warm but not hot. Pour it into a small bowl, add the sugar, and sprinkle the yeast over the surface. Let it sit for 5-10 minutes until it becomes frothy and bubbly. This step ensures that the yeast is alive and ready to help your muffins rise beautifully.
2. Make the Dough
In a large mixing bowl, combine the flour and salt. Add the melted butter and the yeast-milk mixture. Stir until a sticky dough forms. You can use a wooden spoon or your hands; either works perfectly.
3. Knead the Dough
Turn the dough onto a lightly floured surface and knead for 8-10 minutes until smooth and elastic. If you have a stand mixer, use the dough hook attachment on medium speed for about 6 minutes. The dough should be slightly tacky but not overly sticky.
4. First Rise
Place the dough in a lightly greased bowl, cover with a clean kitchen towel or plastic wrap, and let it rise in a warm, draft-free place for 1 to 1.5 hours, or until doubled in size. The yeast will work its magic, giving your muffins a light and airy texture.
5. Shape the Muffins
Once the dough has risen, punch it down gently to release excess air. Roll the dough out on a floured surface to about ½ inch (1.25 cm) thick. Use a round cookie cutter or a drinking glass (about 3 inches in diameter) to cut out individual muffins. Gather the scraps, roll them out, and cut additional muffins.
6. Dust and Rest
Place the cut muffins on a baking sheet or tray lined with parchment paper and sprinkled with cornmeal or semolina. This prevents sticking and gives a slight crunch to the bottom. Cover lightly and allow the muffins to rest for 20-30 minutes while you preheat your griddle or skillet.
7. Cook the Muffins
Heat a non-stick skillet or griddle over low to medium heat. Carefully transfer the muffins to the skillet, leaving a little space between them. Cook for 6-8 minutes on each side, until golden brown. Resist the urge to turn the heat too high; slow cooking ensures the muffins are cooked through without burning the outside.
8. Cool and Split
Transfer the muffins to a wire rack to cool completely. To enjoy, use a fork to gently split the muffins in half horizontally — this preserves their characteristic nooks and crannies, perfect for catching melted butter or jam. Avoid using a knife that can compress the soft interior.
Tips for Perfect English Muffins
-
Low and slow is key: Cooking the muffins over low to medium heat ensures a tender crumb with a lightly crisp exterior.
-
Cornmeal or semolina dusting: This adds texture and prevents sticking while giving an authentic rustic look.
-
Use whole milk: While you can substitute with low-fat milk, whole milk provides richer flavor and softer texture.
-
Patience with yeast: Don’t rush the rising steps. Proper fermentation enhances flavor and creates the iconic airy interior.
-
Fork-split only: Always use a fork to separate your muffins to preserve the nooks for topping.
Variations to Try
-
Whole Wheat English Muffins: Replace half the flour with whole wheat for a nuttier, heartier taste.
-
Cheese Muffins: Sprinkle shredded cheddar or Parmesan into the dough before cooking for a savory twist.
-
Cinnamon Sugar Muffins: Mix a teaspoon of cinnamon into the flour for a lightly spiced breakfast treat.
-
Gluten-Free Option: Substitute with a gluten-free flour blend and add 1 teaspoon of xanthan gum for structure.
Serving Suggestions
English muffins are incredibly versatile. Try these ideas:
-
Toasted with butter and honey or jam.
-
As a base for Eggs Benedict with poached eggs and hollandaise.
-
Split, filled with cheese, ham, or bacon for a hearty breakfast sandwich.
-
Topped with peanut butter and banana slices for a quick, energizing snack.
Storing and Freezing
Homemade English muffins can be stored in an airtight container at room temperature for up to 3 days. For longer storage, freeze the muffins individually and reheat by toasting or warming in a skillet. They taste almost as fresh as the day they were made!
Final Thoughts
Making English muffins at home may take a little time, but the process is rewarding. There’s a special satisfaction in enjoying the light, fluffy, and slightly chewy texture of a freshly cooked muffin, perfectly complemented by melted butter or your favorite toppings. With this recipe, you can enjoy bakery-quality English muffins anytime, turning ordinary breakfasts into something truly special.